How to Contour for Your Face Shape: A Beginner’s Guide
Contouring is a game-changer in makeup it enhances your facial features, sculpts your face, and creates dimension. Whether you want to define your cheekbones, slim your nose, or balance your face shape, the right contouring technique can transform your look. But did you know that contouring isn’t one-size-fits-all? Your face shape plays a crucial role in how you should apply contour, highlight, and blend your makeup.
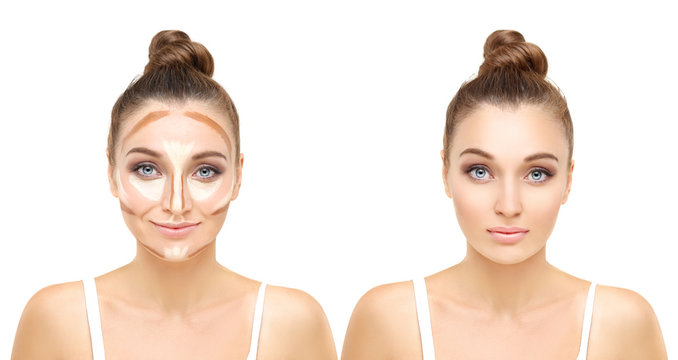
For beginners, contouring can seem overwhelming. Where should you apply bronzer? What products work best? How do you avoid looking unnatural? If you’ve ever struggled with patchy blending or ended up with harsh lines instead of a seamless finish, don’t worry you’re not alone. In this guide, we’ll break down how to contour for your face shape step-by-step, ensuring you achieve a flawless, sculpted look every time. Contouring enhances your features, but pairing it with the right makeup techniques makes all the difference. Discover more ways to flatter your face shape with our Makeup Tips for Different Face Shapes.
Understanding Your Face Shape
Before diving into contouring, you need to identify your face shape. Here’s a quick breakdown of the six common face shapes:
- Oval – Balanced proportions with slightly curved edges.
- Round – Equal width and length with soft, circular features.
- Square – Defined jawline and wide forehead.
- Heart – Broad forehead tapering into a pointed chin.
- Diamond – High cheekbones with a narrow forehead and chin.
- Long (Rectangular) – Longer than wide, with an elongated forehead and chin.
Knowing your face shape will help you apply contour in the most flattering way.
Step-by-Step Guide to Contouring for Beginners
Step 1: Gather Your Tools & Products
To get started, you’ll need:
✅ A contour product (cream, powder, or stick) in 2 shades darker than your skin tone.
✅ A highlighter (liquid, cream, or powder) in 2 shades lighter than your skin tone.
✅ A beauty blender or contour brush for seamless blending.
✅ A setting powder or spray to lock in your look.
Step 2: Apply Contour According to Your Face Shape
Contouring for an Oval Face
🔹 Goal: Maintain balance and enhance natural definition.
- Apply contour along the hollows of your cheeks, blending toward the temples.
- Lightly contour along the jawline and hairline for added structure.
- Highlight the forehead, bridge of the nose, and chin for a radiant effect.
Contouring for a Round Face
🔹 Goal: Add angles and create a slimmer illusion.
- Contour along the temples and jawline to create dimension.
- Apply bronzer under the cheekbones in a diagonal motion toward the ears.
- Highlight the forehead, nose bridge, and chin to elongate the face.
Contouring for a Square Face
🔹 Goal: Soften strong angles and add curves.
- Apply contour along the jawline to reduce harshness.
- Lightly contour the sides of the forehead for balance.
- Highlight the center of the forehead and under the eyes for a soft, lifted effect.
Contouring for a Heart Face
🔹 Goal: Balance a wider forehead with a narrow chin.
- Contour the sides of the forehead to create symmetry.
- Apply bronzer under the cheekbones, blending outward.
- Highlight the chin and under-eye area to draw attention downward.
Contouring for a Diamond Face
🔹 Goal: Minimize wide cheekbones and balance proportions.
- Contour the lower cheekbones and sides of the forehead.
- Apply bronzer to the jawline for a softer look.
- Highlight the forehead and chin to enhance symmetry.
Contouring for a Long Face
🔹 Goal: Create the illusion of a shorter face.
- Contour along the hairline and chin to visually reduce length.
- Apply bronzer under the cheekbones but avoid dragging it downwards.
- Highlight the forehead and cheekbones for a natural glow.
Step 3: Blend for a Natural Finish
- Use a damp beauty blender or fluffy brush to blend contour lines until seamless.
- Avoid harsh lines circular motions work best for powder, while dabbing motions work for cream contour.
- Set with a translucent powder for an all-day flawless look.
Step 4: Apply Blush & Highlighter for Extra Glow
- Blush Placement: Apply on the apples of your cheeks and blend upward.
- Highlighting Tips: Add a soft glow to your cheekbones, nose bridge, and cupid’s bow.
Common Contouring Mistakes & How to Fix Them
🚫 Using the Wrong Shade: Avoid contour products that are too dark or too warm. Stick to cool-toned shades for a natural shadow effect.
🚫 Not Blending Enough: Patchy contour can ruin your makeup. Always blend in soft, circular motions.
🚫 Applying Too Much Product: A little goes a long way! Start with a light hand and build up as needed.
Frequent Ask Questions
1. What’s the best contour product for beginners?
Cream contour sticks are great for beginners because they are easy to blend and build up gradually.
2. Can I contour without foundation?
Yes! You can apply contour directly onto moisturized skin for a more natural, everyday look.
3. How do I choose the right contour shade?
Pick a shade two tones darker than your skin tone with a cool undertone to mimic natural shadows.
4. How often should I clean my contour brushes?
Ideally, once a week to prevent product buildup and bacteria.
5. How do I make my contour last all day?
Set it with a translucent powder and finish with a setting spray to lock in your look.
Conclusion
Contouring doesn’t have to be complicated. By understanding your face shape and applying contour strategically, you can enhance your natural features effortlessly. Whether you’re going for a snatched cheekbone look or a soft sculpted finish, the right techniques will help you achieve a flawless contour every time.
If you’re a beginner, don’t be discouraged if it takes a few tries to master the perfect blend. Practice makes perfect, and with time, contouring will become second nature! Ready to elevate your makeup game? Grab your favorite contour kit and start sculpting your masterpiece today!